
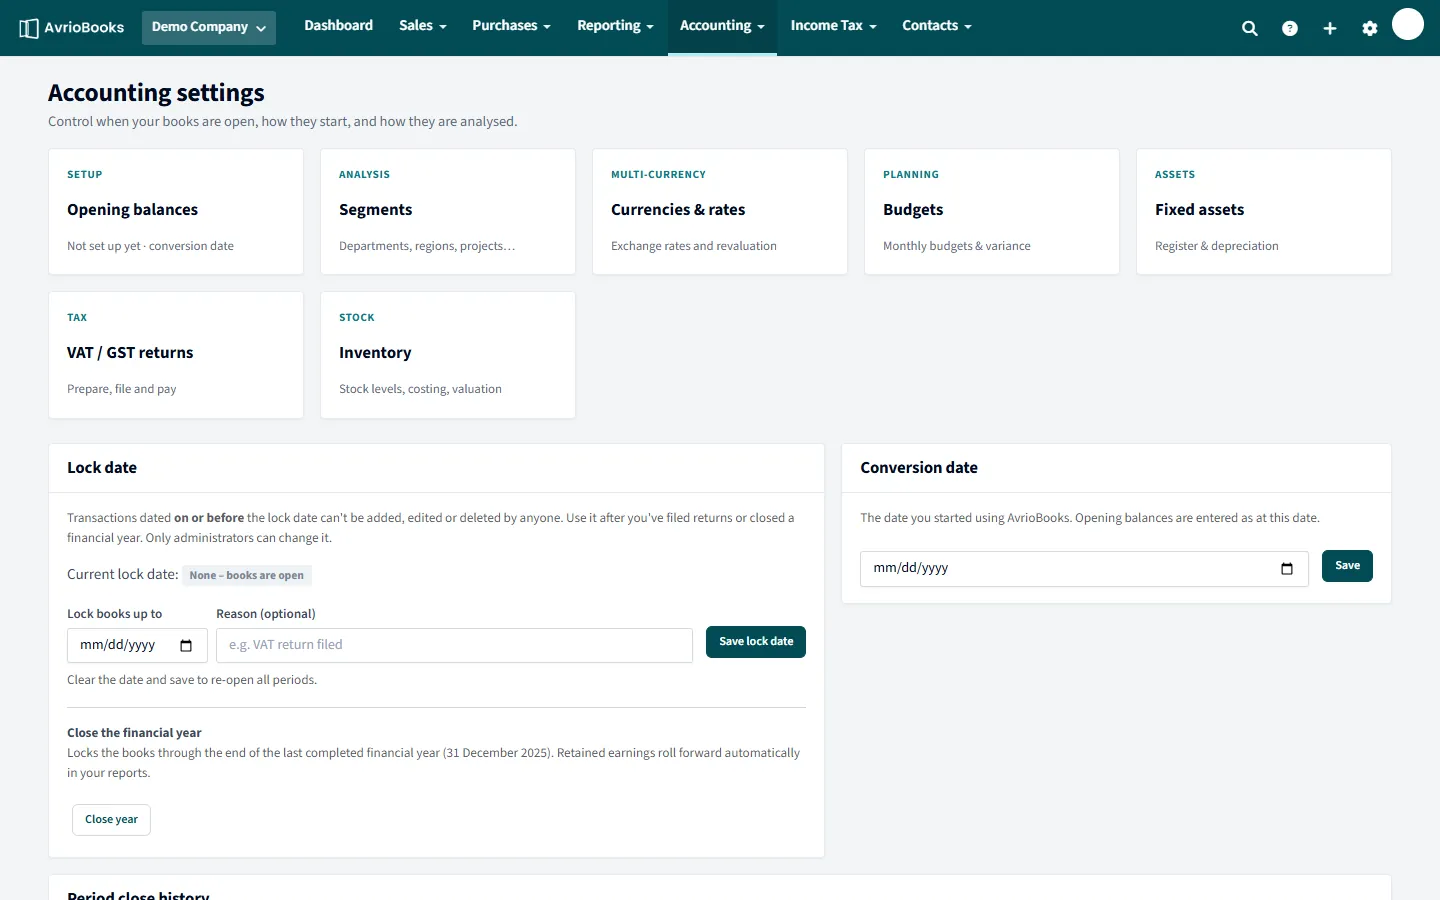
Set your conversion date
The conversion date is the day you started using AvrioBooks. Open Accounting > Accounting settings, enter the date under Conversion date and select Save.
Enter opening balances
- Select Accounting > Opening balances.
- Enter your balance sheet balances as at the conversion date from your previous system. Bank accounts entered here also set the account’s opening balance.
- Select Save opening balances.
Do not enter receivables or payables here. Enter outstanding invoices and bills as normal, dated before the conversion date. Any difference between the debits and credits is posted to the Historical Adjustment account and shown at the bottom of the page.
Lock a period
Transactions dated on or before the lock date cannot be added, edited or deleted by anyone. Use it after you file a return or close a year. Only administrators can change it.
- Open Accounting > Accounting settings.
- Under Lock date, enter Lock books up to and an optional reason such as “VAT return filed”.
- Select Save lock date. Clear the date and save to re-open all periods.
Close the financial year
Select Close year to lock the books through the end of the last completed financial year. Retained earnings roll forward automatically in your reports. Every change is listed under Period close history.
A worked example
You start using AvrioBooks on 1 July. Set the conversion date to 1 July, then on the Opening balances page enter, as at that date: the bank balance, fixed assets, loans and owner’s capital. Enter your unpaid customer invoices and supplier bills individually, dated before 1 July, so ageing works. If the debits and credits do not agree, the difference is posted to Historical Adjustment and shown at the bottom of the page so you can chase it down with your accountant.
A migration checklist
- Set the conversion date.
- Set up your chart of accounts and tax rates.
- Add bank accounts and enter their opening balances.
- Enter unpaid invoices and bills dated before the conversion date.
- Enter the remaining opening balances and review the Historical Adjustment figure.
- Run the Trial Balance as at the conversion date and compare it with your old system.
Using lock dates well
Lock the books after each month end or each filed tax return. Because the lock stops anyone adding, editing or deleting in that period, your filed figures cannot drift. If you must change something, an administrator can temporarily re-open the period, and the change is recorded in the period close history.
Frequently asked questions
Who can change the lock date?
Only administrators. Clear the date and save to re-open all periods.
What does the lock date block?
Transactions dated on or before the lock date cannot be added, edited or deleted by anyone.
Where do I enter outstanding invoices from my old system?
Enter them as normal invoices and bills dated before your conversion date. Do not enter receivables or payables on the opening balances page.